Showing posts with label Design. Show all posts

Thursday, August 16, 2018

The Splendid Sampler II, Block 10: Around Four Corners


Today, we started Week 10 of the Splendid Sampler 2 Block-of-the-Week quilt along.

Last week, we introduced you to the block, called: Flowering Tree by Amy Friend. You can see my version of Amy's block, here.

Although I've never had the pleasure of meeting her, I'm realizing how much I love RachelDaisy's aesthetic. In fact, RachelDaisy is this week's block designer. Check out her blog, here. She's from Australia, which explains to me why I love her design style. I've found how so many Australian designers are super-skilled about combining color and pattern into the most dynamic quilts! 

RachelDaisy's block is called: Around Four CornersHere is my version:


The design of this block is so clever! When I first took a look at the image of the block in the pattern, I wasn't quite sure how it was all going to go together. However, while making the block, I was amazed at how easy (and fun!) it was.

There was one small thing I did differently. Before sewing them together, I laid out all of my 3-patch units that make up the circles so that the seam allowances would line up with the background fabric's seams, as well as with the adjoining pieced circles. Doing this also helped me to line up everything before I hand-appliqued the circles to the background.

The first fabric I chose to use was the dynamic black typewriter keys print by Cosmo Cricket. You can read about the fabrics I'm using, here, here, and hereI love what a bold statement the typewriter keys print makes and felt it worked well as the backdrop to the applique. When I began introducing fabrics for the center spot, I liked the juxtaposition of the small type print, in comparison to the typewriter keys, for the center of my block. And finally, I decided how the large, 3/4 circles should be a place for the eye to rest, so I chose mottled solids, there.

Here's an image of the back of my block:


After finishing, I chose to cut out the bulk from the back of the applique. You'll see my Helen Stubbings' Hugs 'n Kisses Applique Paper that I used to make my circles showing through. I love knowing how it will wash away once I launder my finished quilt. 


The Splendid Sampler 2 book will be available October 2018. It is currently available for pre-sale so order your copy, now!

Thursday, August 9, 2018

The Splendid Sampler II, Block 9: Flowering Tree


Today, we started Week 9 of the Splendid Sampler 2 Block-of-the-Week quilt along.

Last week, we introduced you to the block, called: My Flock by Brenda Ratliff. You can see my version of Brenda's block, here.

This week, meet prolific Foundation Paper Piecing (FPP) pattern designer, Amy Friend, of During Quiet Time. Amy is a two-time author of books covering the same subject. In fact, she's giving one of her books away through her blog post, today, so go check it out for a chance to win.

Amy certainly knows a thing or two about art and design and her work is always filled with interest and gorgeous color. I love everything she does! You can easily find her through her website and Instagram (@duringquiettime) to see her eye-catching designs. 

Amy's block is called: Flowering TreeHere is my version:


When I first started quilting, I taught myself how to FPP. I started by making a tea cup and saucer pattern. Once I figured out the rhythm of foundation piecing, I really enjoyed the process. In fact, shortly after learning this technique, I designed one of my first FPP patterns, called Rocky Mountains Sunset. The pattern came in a variety of sizes.


Rocky Mountains Sunset quilt pattern by SuzGuz Designs


At that time, we were living in Massachusetts and I was reminded of how beautiful our sunsets are, here in Colorado, when I came across these gorgeous batiks at a quilt shop in Arlington, called Fabric Corner.

Back to Amy's block: After I completed it, I noticed how my version looked slightly different from the pattern. I then realized that I added the "sky" pieces before I added the tree trunk/center pieces. Sometimes, even with the best of intentions, I go into a zone and think I'm doing it right, when, in hindsight, I wasn't paying attention and took the steps in a different direction. When I find myself making mistakes, I believe that whatever I'm making is supposed to turn out the way it did and I'm okay with it. I've decided to keep my block as-is since the only difference you'll see once the block is sewn into the quilt top will be at the bottom portion of the trunk; the piece across the top will be hidden in the seam allowance.

Last week, I mentioned that we had a shop hop going on. On Saturday, my husband and I drove to the last three shops on the list and I ended up purchasing a few more potential candidates for my Splendid Sampler II blocks.


I'm not sure if I'll have opportunity to use it, but I sure do love the berries print. The sweet Corey Yoder stripe is great, but the only drawback is that I haven't used any pink, thus far, so that may end up in my stash, as well. It's surely the cutest stripe I've ever seen!


The Splendid Sampler 2 book will be available October 2018. It is currently available for pre-sale so order your copy, now!

Thursday, December 3, 2015

Much Overdue Blog Post

Hello friends...

Where shall I begin? My last blog post was exactly three years ago, today: December 3, 2013. It baffles me how things work out, as I did not plan this. I certainly was stunned, realizing how long it has been! I'll describe the past three years as an adventure full of change, many fruitful opportunities and, at times, an intense whirlwind.

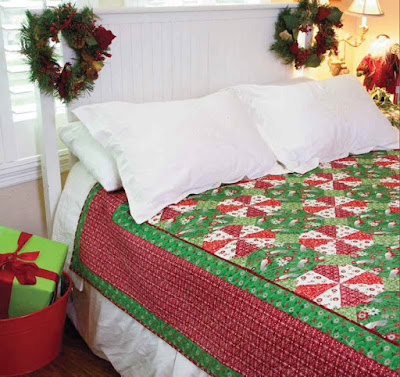
Little Red Bird, McCall's Quick Quilts, Dec/Jan 2014, image compliments of McCall's Quilting. Photographer: Mellisa Mahoney, Stylist: Ashley Slupe


In 2012, I submitted a proposal for my first book and it was accepted. By this time, I was already designing and making quilts monthly for McCall's Quilting with a few extra, here and there. I had  established regular work with other magazines and fabric companies as a pattern writer, editor, illustrator, and designer (both quilts and graphic layout), among other things. My schedule was overflowing.


Project commissioned Spring 2013 by PFAFF. Click on image for pattern link. This quilt comes in 3 sizes.
Modern Diamonds ©SuzGuz Designs 2013 for PFAFF


Project commissioned Spring 2013 by Husqvarna Viking. Click on image for pattern link. This quilt comes in 3 sizes.
The Garden Patch ©SuzGuz Designs 2013 for Husqvarna Viking


Since that time, my best-selling book, All About Strips: Colorful Quilts from Strips of Many Sizes (see reviews on Amazon and Martingale), was published by Martingale, January 2015. In addition, I had the distinct honor of taking over McCall's Quilting as Content Director upon the retirement of Beth Hayes, Editor-in-Chief Emeritus. F+W Media purchased McCall's Quilting at the beginning of 2014, and I came on board to attend Spring Market, beginning to work in the office the 1st of July. At that time, I was in the throes of making quilts and writing patterns for a fabric and graphic designer whose book is slated to come out in 2016. While working at McCall's full time, I would come home and work several more hours into the night and all weekend on the book, wrapping up the last handful of projects. It was grueling, for sure, but I would not have had it any other way. And, wow, did I learn a lot!


Image compliments of Martingale 2015


At the end of August, 2015, I made the difficult decision to resign from my position of running the magazine; one I treasured and valued more than you can imagine. I would miss my highly talented staff and coworkers, working with the best quilt designers in the industry, the ability to work hard to meet our deadlines, the richly creative environment, and most especially, working on creating and molding content worthy of our readership. We all loved what we did and were passionate about maintaining the McCall's style.

We worked hard. I remember last December, as a blizzard was blowing through and the entire building was empty of people except myself, our art director, and graphic designer; how we had our nose-to-the-grindstone so that we could meet a deadline (we were short staffed at the time, and all had to pull together to get the work done). The entire staff worked straight that day and the three of us worked into the night. I remember getting punchy that evening and insisting how we all needed a break and to get a bite to eat. We piled into my SUV and, although the roads were dangerous to drive, we made it out and back safely. Looking back on my entire experience, I cannot tell you how proud I was of our entire staff. Their dedication and hard work at times brought tears to my eyes.


My first issue as Content Director for McCall's. Image compliments of McCall's Quilting. Photographer: Mellisa Mahoney, Stylist: Ashley Slupe

I'm glad I was able to accomplish these milestones: Work on the tail-end of McCall's last special issue (Heritage Quilts Made Modern, Fall 2014), and Beth Hayes' last issue (McCall's Quilting, Nov/Dec 2014). F+W Media changed the Editor-in-Chief title to a new title that encompassed video and digital media: Content Director. My first issue as Content Director was Quick Quilts, Dec/Jan 2015. I was able to work on the last perfect bound, larger-size magazine McCall's published; the Mar/Apr 2015 issue. I was so proud of that cover because it showcased a more casual elegance and playful feel, besides the fact that my dear friend, Amy Gibson/Stitchery Dickory Dock, made a mini quilt, Apple Blossom, for that issue and it topped off the stack of other lovely quilts that made the cover beautiful: Lilli's Pond, by sweet Bev Getschel, Shimmer by long-time contributor and prolific designer, Gerri Robinson, American Wildflowers by dear Audrey Hiers, Cross & Crown, by another sweet lady, Sandra Clemons, Keepsake Violets by the talented long-time contributor team of Sarah Maxwell and Dolores Smith. I believe Amy, Bev, and Audrey used fabrics from their stash, Gerri used her current collection at the time, Summer Cottage for Red Rooster, Sandra used Hadley by Denyse Schmidt for FreeSpirit, and Sarah and Dolores used Victoria's Violets by Molly B's Studio for Marcus Fabrics.

New HOME page for SuzGuz Designs

After leaving F+W/McCall's, my plan has been to revive my business: SuzGuz Designs. In October, my husband tore his labrum (shoulder) and had two tears in his bicep, all at once. And it all happened on his dominant, right side. He's been in a sling since then, and had surgery two weeks ago. This sort of injury is extremely painful and the surgery results in post-op pain for weeks. We look back on this experience and realize how it is all part of God's plan. If I were still working outside of the home, I would have had to take a leave of absence to care for him. As much as I get queasy around anything medical-related, I'm sure glad I've been able to help him; he's been my rock and biggest supporter since I started in the quilting industry.


Wednesday, December 4, 2013

Quiltmaker's 100 Blocks, Vol. 8: GIVEAWAY Announcement

I love to write. I so enjoy the creative process of forming a plan and writing a blog post. But darn it if I can't find the time to do so this year! It's a good thing, though. Really, it is, as I'm working on a couple of huge projects that will be out over the next few years.

In the mean time, I wanted to announce a marvelous giveaway that Quiltmaker is hosting, but you must act fast!

Quiltmaker's 100 Blocks, Vol. 8 is out on newsstands, now!


Image compliments of Quiltmaker Magazine


The giveaway is for the first 8 issues of Quiltmaker's 100 Blocks. That's a total of 800 unique quilt blocks! A bevy of creativity!

You can also read about Ian Davis, the creative lone-wolf guy on Quiltmaker's team!

Here is my applique block found in Volume 8, called: Bouclier de la France. I used coordinating Aurifil 50 wt. cotton thread to machine applique my pieces in place. I felt that the 50 wt. cotton gave the block a cleaner, smoother look and am so pleased with the results.


Image compliments of Quiltmaker Magazine


Looking back, I probably should have used a contrasting thread on the pink flowers to help the petals stand out better.

Fabric is from my stash. Although, I did end up purchasing a fat quarter for the green tulips and the mini print used for the pink flowers from Snappy Quilts (love that store!).

So be sure to hop on over to Quiltmaker's blog, Quilty Pleasures, for a chance to win the pack of 8 magazines . . . good luck!

Wednesday, June 13, 2012

How To Make Fabric Artist Trading Cards, Part II

We left off yesterday ironing the cut collage piece to the batik substrate:


Continue cutting 3 more small pieces from you fusible-backed collage piece.


And give the edges a wave effect . . .


. . . finishing up by ironing the fusible-backed collage pieces to your batik substrates. If you so desire, add a decorative stitch along the wavy edge of the collage pieces. If you like a more textured look to your piece, I'd like to suggest the look of AURIfil's Lana Wool 12 wt. Thread. There are many colors to choose from, and the wool will lend an artistic texture to your finished pieces!


All ATC's should include the name of your piece and your signature, plus any other information you wish to include, such as the date or a dedication of your design. You can sign them when you complete the project, but will need to include a backing for this purpose.

Prepare your backing by selecting a neutral fabric, then cut a strip from it that measures at least 3 1/2" x 10". Additionally, cut a piece of Heat 'n Bond this same size and iron to the back of the fabric strip.


Cut your fusible-backed fabric strip into 4 pieces, 2 1/2" x 3 1/2" and set aside.


 In order to give your ATC's stability, you'll want to add a light weight stabilizer between your top and the backing fabric, making a sandwich similar to how we sandwich a quilt.

Cut a strip of your light-weight stabilizer and a strip of Heat 'n Bond that measures 3 1/2" x 10". 


Iron the Heat 'n Bond to the stabilizer.


Cut your Heat 'n Bond/stabilizer strip into 4 pieces, 2 1/2" x 3 1/2".


 Remove Heat 'n Bond paper from your stabilizer pieces to expose glue and place your collage on top; iron to bond together. Do this to each collage.


Now add the fusible-backed fabric strips: Remove Heat 'n Bond paper from the fusible-backed fabric strips you made earlier and iron the glue-side to the back of the stabilizer. Do this to each collage and trim, if needed.


Using a zig-zag or satin stitch, finish off the edges of your ATC's and sign the backs.


That's it! You've made your first set of Artist Trading Cards!

Everyday blessings,

Susan

Tuesday, June 12, 2012

How To Make Fabric Artist Trading Cards, Part I

There are a myriad of ways to begin your Artist Trading Card project. My first tip would be to begin by sketching out a minimum of 10 ideas. Push yourself to do it. You'll be amazed at what you come up with! And remember: your sketches don't have to be perfect. As you sketch out your ideas, keep in mind that an Artist Trading Card (ATC) measures a finished size of 2 1/2" x 3 1/2".

ATC's were first introduced as business cards; a unique way to show-off artistic talent. They've since become a very popular way to collect miniature works of art. When I was taking classes through The Art Institute, someone introduced me to an ATC online group. After this weekend, I think I'll look into it more seriously, now!

From a basic sketching session, there should be one design that you're drawn to; that you keep coming back to. Listen to this inner voice and run with the idea!

I envisioned making a collage of fabrics. Using a 1/8" seam allowance, I began by sewing strips and pieces together from my scrap bag. Once my sewn strips measured approximately 8" x 12", I began cutting and re-piecing until I had an interesting mosaic. Note: this size is much larger than you'll need, but I wanted to make my piece larger so that I could also use the scraps for future projects.

The following pattern will show you how to make 4 coordinating ATC's.

List of Supplies:

fabric scraps
batik fabric piece, at least 3 1/2" x 10" (I chose an interesting wavy design from my stash)
neutral fabric piece for back
1 spool of coordinating AURIfil thread
rotary cutter
rotary cutting mat
quilter's ruler
sewing machine
scissors
Heat 'n Bond lite
light-weight stabilizer

Measure your pieced fabric collage, then cut a piece of Heat n' Bond the same size. 


Place your fabric collage upside-down on your ironing board . . .


Add the bonding sheet, paper-side-up, and press the textured/"glued" side to the back of your collage (see manufacturer's instructions for further information). Allow it to cool when finished ironing before you work with it.


Once your fabric collage piece has cooled, cut a 2 1/2" strip using your rotary cutter, then cut a piece from this strip that measures approximately 2 3/4" (see photo, lower right):


 Cut your coordinating batik fabric, paying close attention to its pattern. Because I wanted to take advantage of the "wave" of the fabric, I cut a strip 2 1/2" wide to use the wave horizontally in my design.


Cut 4 pieces from your batik fabric strip and lay out on your cutting mat.


Taking the first piece I cut from my fabric collage and using my rotary cutter, I cut a wavy edge off of the 2 3/4" length.


Remove the paper backing from your collage fabric to expose the glued back.


Lay the cut collage piece on top of a batik strip.


Now iron it to the batik substrate.


 Please check back on tomorrow's blog to see how I finished my Artist Trading Cards!

Susan


Tuesday, May 22, 2012

Sneak Peek: Colourblock Style Quilt

Charcoal.


Ivory.


Parchment.


This isn't a very fair sneak peek. However, when working with magazines, it is best practice to give them first rights to publish, if possible.


I'm very excited to start working on my newest quilt, called: Colourblock Style, scheduled for magazine publication early 2013. It will be a simple design using just 3 colors of Robert Kaufman's marvelous Kona Cottons: Charcoal. Ivory. Parchment.


Charcoal image compliments of http://www.weyriver.co.uk/theriver/industry_6_charcoal.htm
Ivory image compliments of http://www.dailyfinance.com/2008/10/24/animals-and-money-ebay-ivory-and-the-animal-trade/
Parchment image compliments of http://grungetextures.com/photos/1019/dirty-parchment-paper.html

Thursday, April 19, 2012

McCall's Quilting Designing Contest


The McCall's Quilt Design Star™ 2012 contest has officially launched and is currently in the qualifying round phase, which continues through April 29, 2012. This year for the first time, the contest has 2 separate tracks for Amateur and Professional Quilt Designers.

Don’t let the term Professional scare you…for the purposes of this contest, a pro is anyone who has ever received monetary compensation for an original quilt design. For example, if you’ve made money by self-publishing a pattern, making a quilt for a fabric company, or teaching a class based on your quilt design at a local shop, you’re a pro!

Grand prizes this year include a sewing machine (a Pfaff quilt expression™ 4.0 with toolbox in the professional group and a Viking Sapphire™ 875 Quilt in the amateur group) and $500 cash to the winner of each group. Winning quilts will also be featured in McCall’s Quilting magazine.

The contest landing page is at http://www.mccallsquilting.com/contests/Quilt_Design_Star_2012.html, where you’ll find complete rules and how to enter. Professional entries are especially encouraged, as this is the first year for that division. Good luck to all who decide to compete!

Thursday, August 11, 2011

GIVEAWAY! Plus Meet August AURIfil Designer-of-the-Month: Jinny Beyer

I'm so fortunate to represent AURIfil threads along with such talented ladies! This month's Designer-of-the-Month is Jinny Beyer!

Image courtesy of AURIfil, 2011

Make Jinny's project (or any of the other free projects from this year!) and you could win a GENEROUS gift of AURIfil threads!

By going to the AURIfil blog, you can get to know Jinny on a personal level, plus be able to download the FREE project she has shared, which is the gorgeous placemat pattern you see here, using her signature border prints.
Sneak peek image courtesy of Jinny Beyer, 2011

Click on over to the AURIfil blog and read the interview conducted by Pat Sloan. Then download the free project designed by Jinny, especially for you!
Remember, if you make any project from this year's design team (any project to your liking), load a photo to our Aurifil Flickr group.. that will qualify you to be in the running to win a generous AURIfil threads prize!

If you have any questions, please let me know!

Thursday, November 11, 2010

DAY 4: Quiltmaker's 100 Blocks Blog Tour


I hope you all are enjoying your week of blogs and give-aways, compliments of Quiltmaker's 100 Blocks!  I know I am, and I look forward to picking winners of my giveaways this weekend!  It's always fun to participate in programs such as this, and I especially appreciate all of you and your kind words!  When you work in a one-girl-studio, it helps to know that people like what you're doing and it gives us, as designers, such great energy to plan new designs and projects for you to enjoy.  So I thank you, from the bottom of my heart! :)  For without your feedback and interest, it simply would not be as satisfying to continue to come up with new patterns and designs.


With today's blog, I plan to share some ideas you may like to use to set my block into a quilt.  I have a few basic tips that are easy and fun, and will enhance a simple quilt top design.

Because the block should be the focus, you'll want to stay away from large, oversize prints.  I would suggest that you find a tone-on-tone, or two-color mini or medium-sized print to sash your blocks with.  I will use my block and it's fabrics as an example, and we will create a few different, easy designs with a touch of panache!

My first example balances the dominance of the deep rose appliqued hearts with a rosy red print border from Verna Mosquera's Savon Bouquet for FreeSpirit.  Sash your blocks with the Lecien blue-on-brown dot I used as the small center square and mini circles.  Then bind the piece with the same blue-on-brown dot.


My second example shows a softer setting, where I use a light blue medallion print for the main border.  The blocks are sashed and the piece is bound using the same fabric as the appliqued hearts.


My 3rd and 4th examples will give you an idea of taking the same sashing and border prints and changing up the binding.  In these examples, I again used the same tone-on-tone deep rose print I used for the hearts to sash the blocks.  Next, I pulled in a pretty, French-inspired floral from the Savon Bouquet line that has touches of blue to marry back to the blue dot background fabric of the appliqued blocks.  Where these pieces differ is with the binding.  See how you can use the blue-on-brown dot for the binding (#3), or pull the tone-on-tone deep rose print out to the border for #4.  Both are attractive and can give you a different "feel", depending on where you will be using the piece.  For example, if you wish to use it as a wall hanging, you may consider using version #3.  You could also use this version in a room where there is a lot of dark wood.  The #4 version is very pretty and feminine and could be used on the wall or as a dresser scarf in a girl's bedroom.  Or, add it to the center of a rustic pine table.


With a few simple changes, you can give your quilt designs a different personality.  Give thought to the myriad of possibilities you can dream up and interview fabrics into your designs that you never would have imagined.  A few questions you can ask yourself, as you pull your fabrics for this design are:

1) Does the fabric work better as a frame to the blocks or as a border?
2) What "feeling" do I want to show with my design?  Do I want it to blend into an eclectic environment, or something more traditional?  More eclectic, use a few different fabrics, if more traditional, stick to the same fabrics with smaller borders and use a different print for larger borders.
3) What decor do I wish to place this design in?  Consider the style and color tones of fabrics in order to blend well with your decor.  Before purchasing fabrics, ask your local shop for sample pieces to bring home with you if you are not sure they will work.

In addition to the table runner/wall hanging design shown here, I'd like to share an idea with you on how to place the blocks into a quilt design.  The quilt size is approximately 67 1/2" x 67 1/2".  I will be posting a pattern to make both the quilt and the runner designs next week!


Now back to the give aways for today!  As mentioned on Tuesday, I will be giving away a Quiltmaker's 100 Blocks Vol. 2 magazine today.  My second give away for today is my Patchwork Rendezvous pattern, as well as my In a Snap! pattern.  Both are very easy and fun to make for any level of quilting experience.

Thanks again for all of your kind messages left this week!  Please remember to leave a comment and either "Friend" me ("Susan Guzman") on Facebook, or add me to your blog read list.  Have a lovely Thursday!

Susan